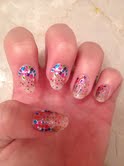
- Paint two coats of a light blue polish, such as Sephora by OPI Havana Nights, on thumbs and pointers.
- Paint two coats of a slightly darker light blue polish, such as Essie Bikini So Teeny, on middle fingers and pinkies.
- Paint two coats of a glitter polish, such as OPI Rainbow Connection, on ring fingers.
- Using a toothpick, create blue polka dots, using Essie Bikini So Teeny, on thumbs.
- Using a white Sally Hansen nail art pen, create vertical lines on pointer fingers.
- Using a white Sally Hansen nail art pen, create small white flowers with light blue centers on middle fingers.
- Using a Q-Tip, create larger light blue polka dots on pinkies.
- Finish with a top coat.

- Paint two coats of white polish, such as Sally Hansen White On, on each nail.
- Paint a small dot of green polish, such as OPI Greenwich Village, on each nail.
- Paint a small dot of yellow polish, such as OPI Need Sunglasses?, on each nail.
- Paint a small dot of pink polish, such as Essie Lights, on each nail.
- Paint a small dot of purple polish, such as OPI Purple With a Purpose, on each nail.
- Paint a small dot of blue polish, such as Sephora by OPI Blue Slushie, on each nail.
- Using a black nail art pen, trace each colored dot in a "U" or "V" shape.
- Create small black dots around the rainbow leopard spots, using a black nail art pen.
- Finish with a top coat.

- Paint all nails except pointer fingers light blue.
- Paint pointer fingers red, with a polish such as Essie Silken Cord.
- Using a white Sally Hansen nail art pen, create 5 thin vertical lines on pointer fingers.
- Paint OPI Pirouette My Whistle over middle fingers.
- Using a red Sally Hansen nail art pen, create small polka dots on middle fingers.
- Using a Q-Tip, create larger white polka dots on pinky fingers.
- Using a red Sally Hansen nail art pen, create smaller red polka dots in the middle of the white polka dots on both pinkies.
- Use a light pink polish to create 4 large polka dots on opposite corners of thumbs and ring fingers.
- Using a red Sally Hansen nail art pen, draw 2 lines on either side of the pink polka dots with one dot in the middle on thumbs and ring fingers, in order to create roses.
- Using a green Sally Hansen nail art pen, create leaves on the edges of all roses.
- Finish with a top coat.

- Paint pointer, middle and pinky fingers with two coats of a red polish, such as Essie Silken Cord.
- Paint thumb and ring fingers with two coats of a navy polish.
- Paint OPI top coat Pirouette My Whistle over middle fingers and thumbs.
- Using a Sally Hansen white nail art pen, create narrow horizontal stripes on pointer fingers and pinkies.
- Draw an anchor on ring fingers using a white Sally Hansen nail art pen.
- Finish with a top coat.

- Paint two coats of a blue polish, such as Essie Smooth Sailing, on each nail except the ring fingers.
- Paint two coats of a white polish, such as Sally Hansen White on, on each ring finger.
- On each white nail, create an arched ring shape with a silver nail art pen.
- Place a silver rhine stone in the middle of each silver arch.
- Finish with a top coat.

- Paint one vertical half of each nail with two coats of white polish, such as Sally Hansen White On.
- Paint the other vertical half of each nail with two coats of yellow polish, such as OPI Need Sunglasses?.
- Paint the top quarter of each nail, above the white polish, with two coats of a cobalt polish, such as China Glaze Frostbite.
- Paint the opposite top quarter of each nail with two coats of red polish, such as Essie Silken Cord.
- Once dry, use a black nail art pen to separate each square of nail polish.
- Finish with a clear coat.
- Attach a Kiss brand rhinestone nail sticker to each nail.
- Fold excess edge over nail and file off.